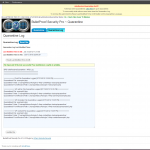
 ARQ Infinity – AutoRestore/Quarantine is a very powerful feature in BulletProof Security Pro and nothing like it exists anywhere else because it is the first of its kind in website security.
ARQ Infinity monitors and protects all your WordPress website files. ARQ Infinity also includes options to add additional website files that are non-WordPress files to the ARQ Infinity Cron check.
In other words, ARQ Infinity can monitor and protect all of your website files with autorestore and quarantine capabilities whether they are WordPress files or non-WordPress files. If your Host Server is hacked or your FTP password is cracked then ARQ Infinity will still protect your individual website by autorestoring and quarantining files automatically.
The official AutoRestore/Quarantine Guide has been posted in the BulletProof Security Forum link below. The Guide contains additional extensive Help & Troubleshooting information as well as the Calibration steps for ARQ (excluding files from being checked by ARQ) for AutoRestore / Quarantine
http://forum.ait-pro.com/forums/topic/autorestore-quarantine-guide-read-me-first/
ARQ Infinity Calibration
When you first install BPS Pro you may need to exclude some files or folders from being checked by ARQ. 99.99% of your website files are static files and typically only 2 to 5 dynamic files and folders will need to excluded from being checked by ARQ Infinity. This BulletProof Security Pro video tutorial shows how to exclude static files that are dynamically updated, how to exclude a dynamic folder from being checked by ARQ, how to use the Quarantine Restore Files option and how to correctly turn Off ARQ when upgrading WordPress.
BPS Pro AutoRestore/Quarantine Calibration Video Tutorial (pending update – video has been removed)
The 3 Primary Website File Types Are:
1. Static Files – Most website files are static files that are not dynamically updated and will not change on a regular basis and should be monitored and protected by ARQ Infinity. 99.99% of your website files are static files and typically only 2 to 5 dynamic files and folders will need to excluded from being checked by ARQ Infinity.
2. Static Files That Are Dynamically Updated – Static files such as sitemap files are actually dynamic files because they are updated regularly and typically automatically updated. These types of files have a known specific file name that will not change. These particular types of files do not need to be monitored by ARQ Infinity and can be excluded from being checked by ARQ Infinity using the Add / Exclude Static Files options.
3. Dynamic Temp, Cache or Backup Files – Another type of dynamic files are temporary, cache or backup files (created by a backup plugin), which do not have a known specific file name because they are created / generated with random file names (typically with md5) or by adding a date to the filename (file backups). These types of files can be excluded from being checked by ARQ Infinity by excluding the temp, cache or backup folder name using the Exclude Dynamic Folders – Temp/Cache option.
Exception: Handling Files With No File Extensions – If you have files that are not named with a file extension then in some cases these files will not be backed up using the Backup Files buttons (in most cases files without file extensions will be backed up by clicking the ARQ Backup Files buttons). If these files are dynamically updated and are being quarantined on a regular basis and you want to exclude them from being checked by the ARQ Cron then you will need to manually copy the files to the relative autorestore backup folder path. Example: A Root file named “no-file-extension” would need to be manually copied to the relative backup folder path of /wp-content/bps-backup/autorestore/root-files/no-file-extension. You can then use the Add / Exclude Static Files tool to exclude this file from being checked by ARQ. See the example below for excluding an individual file from being checked by ARQ.
Add / Exclude Static Files – Specific Examples and What to Do to Calibrate ARQ Infinity
Static files are files that have a known file name that will not be changed or generated randomly like cache or temp files. These files are also dynamic because they are updated regularly by a plugin or theme, but the name of the file will never change. Example: sitemap.xml.
NOTE: The Root website folder will typically contain both WordPress and non-WordPress files. ARQ has been designed to allow you to exclude any file in your Root folder, whether it is actually a WordPress or non-WordPress file.
Google XML Sitemaps Plugin: If you are using Google XML Sitemaps your sitemap files will be updated dynamically every time you create a new post or page. This will cause your sitemap files to be sent to Quarantine. To permanently tell ARQ Infinity not to check these dynamic files you would use Exclude Files tool on the AutoRestore/Quarantine – Add / Exclude Files page.
1. Choose the Exclude An Individual File option.
2. Add the path to your sitemap.xml file and click the Exclude button. Repeat the same steps to exclude the sitemap.xml.gz file. These files will no longer be checked by the ARQ Infinity Cron.
/home/content/xx/xxxxx/html/aitpro-blog/sitemap.xml
/home/content/xx/xxxxx/html/aitpro-blog/sitemap.xml.gz
3. Use the Quarantine Restore File option to restore your sitemap files. You can do this before or after excluding your sitemap files from being checked.
W3 Total Cache: You may need to do a one time Quarantine Restore File for the w3-total-cache-config.php file or depending on your W3TC configuration choices you may need to exclude this file permanently from being checked. This file is dynamic in that when you click the deploy button on the W3TC settings page it will generate a new config file. If this file is quarantined again after restoring it from Quarantine then follow the steps above to Exclude An Individual File so that this file will not be checked again by the ARQ Cron. Example path: /home/xxxxx/public_html/wp-content/w3-total-cache-config.php.
BPS Pro: There are a couple of .htaccess files included with BPS Pro that are dynamic that will be updated with your current IP address when performing certain actions. For example the Pro-Tools .htaccess file should be excluded from being checked by adding it to the Exclude Files tool on the AutoRestore/Quarantine – Add / Exclude Files page.
1. Choose the Exclude An Individual File option.
2. Add the path to your BPS Pro-Tools .htaccess file and click the Exclude button. This particular .htaccess file will no longer be checked by the ARQ Infinity Cron.
/home/content/xx/xxxxx/html/aitpro-blog/wp-content/plugins/bulletproof-security/admin/tools/.htaccess
3. Use the Quarantine Restore File option to restore your Pro-Tools .htaccess file. You can do this before or after excluding this particular .htaccess file from being checked.
Exclude Dynamic Folders – Temp/Cache – Specific Examples and What to Do to Calibrate ARQ Infinity
Examples of CORRECT Paths to Exclude: These folder paths are CORRECT because they are not full website paths to these folders and they do not contain /wp-content in the path and they do not start or end with forward slashes. If you have a backup plugin that is creating dynamically named backup files you can also use this option to exclude the backups folder from being checked.
CORRECT: plugins/example-plugin/captcha/temp
CORRECT: themes/example-theme/cache
CORRECT: example-plugins-backup-folder-name/backups (this is assuming that the example plugin’s backup folder is in the wp-content folder and it has a subfolder called “backups” inside of the “example-plugins-backup-folder-name” folder.
Steps To Excluding Dynamic Folders From Being Checked by ARQ Infinity
1. Enter the folder path that you want to exclude in one of the Excluded Temp/Cache Folder Path empty text boxes.
2. Enter a Label or Description.
3. Click the 1. Save To DB button.
4. Click the 2. Create Filter button.
5. Click the 3. Exclude Folders Now button.
NOTE: If you are not seeing the new Exclude Dynamic Folders – Temp/Cache feature in AutoRestore then you do not have the latest BPS Pro version installed – 5.1.8.3. To force a BPS Pro plugin update check. Go to your WordPress Plugins main page, refresh your Browser, then click on the WordPress Dashboard link and you should now see a new BPS Pro version available (only if a new version is available). Normally plugin update checks are done twice daily by WordPress.
AutoRestore / Quarantine Screenshots
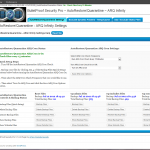
AutoRestore/Quarantine Settings Page Read Me Help Info
AutoRestore/Quarantine – ARQ Infinity General Concepts
It is important to understand generally how ARQ Infinity works. ARQ Infinity – AutoRestore/Quarantine is a very powerful feature and nothing like it exists anywhere else because it is the first of its kind in website security. There are many FailSafes built into ARQ Infinity to prevent any website problems from occurring – The ARQ Cron will shut itself down automatically in the event that a serious user error has occurred and an alert will be displayed in the WP Dashboard when an ARQ Cron FailSafe Shutdown has been triggered due to user error.
How ARQ Infinity Works
ARQ Infinity basically works by comparing filesizes for all files that you have backed up against the filesizes of your actual website files. If a website file is modified and the filesize does not match your backed up file filesize then the file will be autorestored with AutoRestore and a copy of that modified file will also be sent to Quarantine. If a new file is uploaded to your website and a copy of that uploaded file does not exist in backup then that file is sent to Quarantine. Quarantine has 3 options for files that have been quarantined. 1. View File, 2. Restore File or 3. Delete File. If a file is sent to the Quarantine folder due to user error then it can be quickly and easily restored by selecting the Restore File option. ARQ Infinity includes all the tools you will need to perform any action you need – backing up files to backup, deleting files from backup, adding additional website files and excluding files from being checked by the ARQ Cron. You should NEVER manually (FTP or Web Host Control Panel) change, modify, move, upload or delete any files in backup. ARQ Infinity is utilizing your database to perform many tasks so if you manually (FTP or Web Host Control Panel) change any files in backup then this could result in serious website problems. All the tools you need are included in ARQ Infinity and you should not have to do anything manually with backup files.
Quick Setup Steps
1. Turn Off the AutoRestore/Quarantine ARQ Cron Check. This may be done automatically for you depending on whether or not files have already been backed up yet or if this is an upgrade. The ARQ Cron DB option will be deleted in certain situations and/or ARQ Cron FailSafe Shutdowns may occur until you have performed all of the Quick Setup Steps.
2. Backup your files by clicking ALL 4 of the Backup Files (Quick Setup) buttons before turning the AutoRestore/Quarantine ARQ Cron On. If you do not back up all files you will see ARQ Cron FailSafe Shutdown alerts.
3. Then select the ARQ Cron Check Frequency that you would like to use. It is recommended that you choose either Run Cron Check Every 5 Minutes, Run Cron Check Every 10 Minutes or Run Cron Check Every 15 Minutes. Choosing to run the Cron Check every 60 seconds is not a good idea and could cause a serious resource drain and cause website performance problems.
4. Then select Turn On ARQ Cron and click the Save ARQ Cron Options button.
IMPORTANT NOTES:
1. When a new version of WordPress is available you will see this warning – WARNING!!!! The AutoRestore/Quarantine Cron Is On. The AutoRestore/Quarantine Cron Check MUST be turned Off before Upgrading WordPress. Click Here to go to AutoRestore and turn Off the ARQ Cron check before Upgrading WordPress. IMPORTANT!!! Before turning the ARQ Cron back On you MUST click ALL 4 of the Backup Files (Quick Setup) buttons.
IMPORTANT!!! When you see this warning – Actually really do turn the ARQ Cron Check Off before upgrading WordPress. Failure to turn off the ARQ Cron Check will most likely result in you having to restore your website files from backup (not your WordPress DB and ONLY files would need to be restored, but still an unnecessary headache – turn it Off). IMPORTANT!!! After you have upgraded WordPress click ALL 4 of the Backup Files (Quick Setup) buttons before turning the AutoRestore/Quarantine ARQ Cron On.
2. Every time a file has been autorestored/quarantined you will see this AutoRestore Alert – AutoRestore/Quarantine Alert!!! – A file has been Quarantined. Click Here to go to Quarantine. To see exactly what actions were taken view the Quarantine Log. To remove this alert click the Reset Last Modified Time in DB button on the Quarantine Log page.
Any file that is sent to Quarantine can be restored with one click by choosing the Restore File option in Quarantine.
3. If a plugin needs to write to one of your WordPress files temporarily or you are manually editing WordPress files or non-WordPress Added files then you can either turn the ARQ Cron Off, use the Add/Remove options, or Exclude options or just use the Restore File option on the Quarantine page to restore that file after the file has been written too or modified and then autorestored and quarantined because the filesize will be different. It is entirely up to you to choose whichever method works best for you. The end result will be exactly the same.
AutoRestore/Quarantine Controls & Backup Status
The AutoRestore/Quarantine Cron MUST be Turned Off anytime you are using the AutoRestore/Quarantine Controls. There are several FailSafes in place to prevent turning the ARQ Infinity Cron back On and other safeguards if user errors have been made.
Backup Files (Quick Setup) – You have 4 Backup Files buttons, one for each WordPress Core folder. Your Root Folder, your wp-admin folder, your wp-includes folder and your wp-content folder. Clicking the Backup Files button will backup all files in that folder so that they will be protected and checked by the ARQ Infinity Cron Check.
Delete Backup Files – You have 4 Delete Files buttons, one for each WordPress Core folder. Your Root Folder, your wp-admin folder, your wp-includes folder and your wp-content folder. Clicking the Delete Files button will delete all Backup files in that folder. If no files exist in a Backup folder the ARQ Infinity Cron will automatically not run a check on that folder and a ARQ Cron FailSafe Shutdown alert will be displayed in your WP Dashboard.
Restore Backup Files – Quarantine has a Restore File option for restoring files sent to Quarantine. This Restore Backup Files button has a different purpose entirely. You have 4 Restore Backup Files buttons, one for each WordPress Core folder. Your Root Folder, your wp-admin folder, your wp-includes folder and your wp-content folder. Clicking the Restore Backup Files button will copy your backup files and overwrite your website files with the backup files. Using this ARQ control is a manual AutoRestore.
Show Backup Files – You have 4 Show Backup Files buttons, one for each WordPress Core folder. Your Root Folder, your wp-admin folder, your wp-includes folder and your wp-content folder. Clicking the Show Backup Files button will display all of your Backup files in that folder.
Show Website Files – You have 4 Show Website Files buttons, one for each WordPress Core folder. Your Root Folder, your wp-admin folder, your wp-includes folder and your wp-content folder. Clicking the Show Website Files button will display all of your website files for that folder.
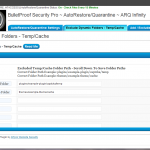
Exclude Dynamic Folders – Temp/Cache Page Read Me Help Info
Exclude Dynamic Folders – Temp/Cache General Concept
The Primary purpose of this feature is to allow you to exclude dynamic temp and cache folders from being checked by the ARQ Cron. If cache or temp files are being sent to Quarantine you can add that temp or cache folder name here and that folder will no longer be checked by that ARQ Cron. All plugins and themes will write cache or temp files to a folder under the /wp-content folder ONLY. This feature is ONLY designed to exclude dynamic folders under /wp-content. This feature is designed for WordPress /wp-content folders ONLY. For non-WordPress folders and files you would use the Add and Remove options on the Add / Exclude Static Files page.
IMPORTANT NOTE: Adding a dynamic folder to exclude is a 3 button click process and unfortunately the first button – 1. Save To DB button will send you out of the Exclude Dynamic Folders – Temp/Cache page and you will need to go back to this page to click buttons 2. and 3. to complete the Exclude Dynamic Folders process. At some point redirection will be added to counter the default WordPress action when using the Settings API options.
Examples of CORRECT Paths to Exclude: These folder paths are CORRECT because are not full website paths to these folders and they do not contain /wp-content in the path and they do not start or end with forward slashes.
CORRECT: plugins/example-plugin/captcha/temp
CORRECT: themes/example-theme/cache
Examples of INCORRECT Paths to Exclude: These folder paths are INCORRECT because they are full website paths to these folders and they contain /wp-content in the path and they start or end with forward slashes.
INCORRECT: /xxxxx/xxxxx/public_html/wp-content/themes/example-theme/cache/
INCORRECT: /xxxxx/xxxxx/public_html/wp-content/themes/example-theme/cache/
INCORRECT: /wp-content/themes/example-theme/cache/
Steps To Excluding Dynamic Folders From Being Checked by ARQ Infinity
1. Enter the folder path that you want to exclude in one of the Excluded Temp/Cache Folder Path empty text boxes.
2. Enter a Label or Description.
3. Scroll down and click the 1. Save To DB button.
4. Then click the 2. Create Filter button.
5. Then click the 3. Exclude Folders Now button.
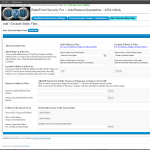
Add / Exclude Static Files Page Read Me Help Info
Add/Exclude Files General Concept
On the main AutoRestore Settings page you have created backup copies of all of your WordPress folders and files. These folders and files will automatically be checked and protected by the ARQ Infinity Cron. To add additional non-WordPress folders and files ONLY that you would like checked and protected by the ARQ Infinity Cron you would add them by using the Add Folders & Files options form. To exclude any WordPress folders and files ONLY that you DO NOT want checked and protected by the ARQ Infinity Cron you would exclude them by using the Exclude Folders & Files options form. Both Added and Excluded folders and files can be removed at any time by using the Remove Folders & Files DB Search Tool.
NOTE: You CANNOT exclude temp or cache files that are created by some plugins because these files are randomly generated files that may only exist temporarily. Use the Exclude Dynamic Folders – Temp/Cache feature for adding temp or cache folder names.
NOTE: There is ONLY one exception where WordPress and non-WordPress files are backed up together – when you backup your Root files on the AutoRestore/Quarantine Settings page you are backing up both WP Core Root files and any other non-WordPress files that are in your Website Root folder. All files in your Website Root folder should be treated like WordPress files. Example: You would use Exclude and not Add for Website Root files.
NOTE: XAMPP or other similar Windows based Developer applications will use a different folder path naming convention when Adding or Excluding files. Examples: XAMPP Path – C:\xampp\htdocs\wordpress/wp-includes\atomlib.php. C:\xampp\htdocs\wordpress/wp-content\plugins\bulletproof-security\admin\php\bps_php_error.log
Add Folders & Files Examples and Best Recommended Use – For non-WordPress Folders & Files ONLY
Add Top Level Folder option
Best Recommend use is to select the Add Top Level Folder option to add an entire non-WordPress folder to backup and to be checked by the ARQ Cron. Example: You have a Top Level non-WordPress Folder named orange. The folder path is /xxxxx/xxxxx/orange. You would select the Add Top Level Folder option and then enter the folder path to this folder /xxxxx/xxxxx/orange in the Enter an Add Folder or File Path text box and click the Add button. Additional Add options are Add a Specific Folder and Add An Individual File.
Add A Specific Folder option
Adding a specific folder can be used for adding ONLY a specific folder and all files in that specific folder – no subfolders of that specific folder will be added to backup and checked by the ARQ Cron. Example: You have a subfolder named orange-subfolder inside of the Top Level Folder named orange. The folder path is /xxxxx/xxxxx/orange/orange-subfolder. By adding only the specific folder orange-subfolder ONLY the files in that folder will be added to backup and checked by the ARQ Cron. Any files in the parent folder /xxxxx/xxxxx/orange/ will NOT be added to backup and be checked by the ARQ Cron and any subfolders of the /orange-subfolder will not be added to backup and checked by the ARQ Cron. Example: /xxxxx/xxxxx/orange/orange-subfolder/another-subfolder. The files in the /another-subfolder subfolder will not be backed up or checked by the ARQ Cron.
Add An Individual File option
Add an individual file will add just a single file to backup and be checked by the ARQ Cron. The most likely use for this would be if you are working on a particular file and you do not want the ARQ Cron to check it while you are working on it you would use the Remove Added Folders/Files Search tool to temporarily remove this file and after you are finished working on the file you would select the Add An Individual File option to add the file back to backup to be checked again by the ARQ Cron. You would enter the full path and filename in the Enter an Add Folder or File Path text box. Example: /xxxxx/xxxxx/orange/orange-subfolder/orange.php.
Exclude Folders & Files Examples and Best Recommended Use – For WordPress Folders & Files ONLY
Exclude An Individual File option
Best Recommend use is to select the Exclude An Individual File option to exclude individual WordPress files ONLY from being checked by the ARQ Cron. Example Use: You have a plugin installed that regularly writes some content to a log file – /wp-content/plugins/example-plugin/Log-file.txt. Because the log file is being changed regulary the ARQ Cron will autorestore and quarantine that log file each time the file changes. To exclude that log file from being checked by the ARQ Cron you would select the Exclude An Individual File option and enter the path to the file that you want excluded in the Enter an Exclude Folder or File Path text box – /xxxxx/xxxxx/wp-content/plugins/example-plugin/Log-file.txt and click the Exclude button.
Exclude A Specific Folder option
Excluding a specific folder can be used for excluding ONLY a specific WordPress folder and all files in that specific folder – no subfolders of that specific folder will be excluded from being checked by the ARQ Cron. Example: You have a WordPress plugin subfolder named /wp-content/plugins/example-plugin/example-subfolder and you want to exclude the entire folder /example-subfolder and all files in that specific folder from being checked by the ARQ Cron. You would select the Exclude A Specific Folder option and enter this path in the Enter an Exclude Folder or File Path text box – /xxxxx/xxxxx/wp-content/plugins/example-plugin/example-subfolder. By excluding only the specific folder /example-subfolder ONLY the files in that folder will be excluded from being checked by the ARQ Cron. Any files in the parent folder /xxxxx/xxxxx/wp-content/plugins/example-plugin will NOT be excluded from being checked by the ARQ Cron.
Exclude Top Level Folder option
Use caution if you decide to use this option. Excluding a Top Level Folder means that the WordPress folder that you choose to exclude and all subfolders and files of that WordPress folder will be excluded from being checked by the ARQ Cron. Typically you should only need to exclude individual files that are repeatedly quarantined by the ARQ Cron, but if you are modifying several files in a WordPress folder then you could use this option to exclude the entire folder while you are modifying files in that folder and then use the Remove Excluded Folders/Files Search tool to remove the files from being excluded by the ARQ Cron check. Example: You are modifying several of your Theme files. You have a Top Level WordPress Folder named /xxxxx/xxxxx/wp-content/themes/my-theme and you want to exclude all subfolders and files from being checked by the ARQ Cron while you are modifying your Theme files. You would select the Exclude Top Level Folder option and then enter the folder path to this folder /xxxxx/xxxxx/wp-content/themes/my-theme in the Enter an Exclude Folder or File Path text box and click the Exclude button. After you are done modifying your Theme files you would FIRST backup your files by going to the AutoRestore/Quarantine Settings page and clicking the Backup Files button for the /wp-content folder and then use the Remove Excluded Folders/Files Search tool to find and remove these files from being excluded from the ARQ Cron check.
Remove Folders & Files General Concept
When you Add or Exclude Folders and Files those file paths are added to your WordPress database. Using the Remove Folders & Files search tools lets you search your WordPress database for these folder and file paths that you want to remove from your DB. There are 2 separate search tools for searching: 1. Remove Added Folders/Files Search & 2. Remove Excluded Folders/Files Search. Your Search Results are displayed in a Radio Button Form with 2 options. 1. Remove. or 2. Do Not Remove next to each search result returned. Since the Remove Folders & Files Search tools are searching your database you can use very general search terms. For example to search for all php files that you have Added or Excluded you would search for .php. For all text files you would search for .txt. To search for a particular folder name you would type in that folder name without having to add a folder path. If you type in a single forward slash / as your search then all database entries will be shown in either the Added Files database Table or Excluded Files database Table because all database entries contain paths that have a forward slash in them.
Remove Added Folders/Files Search
Your Search Results are displayed in a Radio Button Form with 2 options. 1. Remove. or 2. Do Not Remove next to each search result returned. Clicking OK will Remove the DB entry for any Added file where you have selected the Remove Radio button and also delete the Added file that you no longer want checked by the ARQ Cron.
Remove Excluded Folders/Files Search
Your Search Results are displayed in a Radio Button Form with 2 options. 1. Remove. or 2. Do Not Remove next to each search result returned. Clicking OK will Remove the DB entry for any Excluded files where you have selected the Remove Radio button. By removing the file path from being Excluded you are telling the ARQ Cron to check the file again.
Folder & File Search Tool General Concept
Use the Folder & File Search Tool to quickly and easily find folder name & file name paths to use in either the Add Folders & Files options or the Exclude Folders & Files options. You can copy and paste the folder or file paths search results directly into either the Enter an Add Folder or File Path text box or the Enter an Exclude Folder or File Path depending on whether you are Adding or Excluding a folder or file. This is a time saver and error prevention search tool.
Show ONLY Top Level Folders
This search tool will display All Top Level Folders and folder paths for your website / Hosting Account in the Document Root folder. The best use for this tool is when looking for Top Level Folders to add to Add Folders & Files.
Show ALL Folders Top Level & Subfolders
This search tool will display All Folders and folder paths for your entire Hosting Account. Use caution here. If you have multiple WordPress websites you would not want to add any folders or files from those separate WordPress websites to have the ARQ Cron check them twice on 2 separate websites. As an experimental idea it is also possible to designate a separate WordPress website to check other WordPress files. This has not been experimented with, but the concept is possible.
Search a Specific Folder For All Files in That Folder
This search tool will display All file paths for ONLY a specific folder path that you enter into the search text box. The folder path must be valid. Example: /xxxxx/xxxxx/foldername/some-other-foldername.
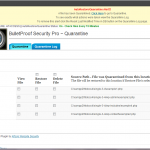
Quarantine Page Read Me Help Info
Quarantine General Concept
The Quarantine folder is located in an isolated .htaccess protected directory that cannot be accessed by anyone other than you. When a file has been autorestored by the ARQ Cron, a copy of that modified file that was autorestored is sent to Quarantine before it was autorestored. This allows you to restore the modified file that is in quarantine and overwrite the autorestored file. Or in other words restoring a file from Quarantine is an Undo. If a new file is uploaded to your website and a copy of that uploaded file does not exist in backup then that file is sent to Quarantine. If there are no files in Quarantine the Quarantine Checkbox Form will display an empty table with this displayed message – No Files in Quarantine. If there are files in Quarantine the Quarantine Checkbox Form will display the file name, the time the file was quarantined, the source path where the file was quarantined from and Checkbox Form options: 1. View File, 2. Restore File or 3. Delete File. The Restore File option allows you to quickly and easily restore a file if it needs to be restored. Restore File and Delete File have Select All Checkboxes located above the Restore File and Delete File Column text.
NOTE: The Quarantine Log logs the specific details about the action that was taken when a file is sent to Quarantine. View the Quarantine Log Read Me button for specific details about the Quarantine Log.
NOTE: It is recommended that you first use the View File Checkbox Form option before choosing to restore or delete a file in Quarantine.
View File Option:
Selecting the View File Checkbox Form option will display the contents of the quarantined file that you have selected to view.
Restore File Option:
Selecting the Restore File Checkbox Form option does 3 things: 1. Copies the quarantined file to the autorestore backup folder and overwrites the backed up copy of the file. 2. Moves the file out of quarantine to the original source path where the file was quarantined from and overwrites the file that was autorestored. 3. Deletes the database entry for the quarantined file.
NOTE: If you create a new folder with new files or upload a new folder with files in it to your website then using the Restore File option will NOT create that new folder in your autorestore backup folder for security reasons. You can restore the file, but the file or files in that new folder will continue to be quarantined because they will be seen as illegitimate website files based on the fact that the folder name does not exist in autorestore backup. To correct this issue turn Off the ARQ Cron, add your new folder and upload your new files and then click the appropriate Backup Files button on the AutoRestore/Quarantine Settings page if this new folder and files are WordPress files. Or if this new folder and files are non-WordPress files then use Add Folders & Files form on the AutoRestore Add / Exclude Files page to add this new folder and files to backup, then turn the ARQ Cron back On.
Delete File Option:
Selecting the Delete File Checkbox Form option does 2 things: 1. Deletes the file permanently from the Quarantine folder. 2. Deletes the database entry for the quarantined file.
Quarantine Log Page Read Me Help Info
Quarantine Log General Concept
The Quarantine Log logs specific information about what action was taken so that you can quickly visually identify exactly what action occurred. See the example Quarantine Log Entries below for the different types of Log entries you may see. The Quarantine Log entries will tell you what Top Level folder the file was quarantined from, the original source path of where the quarantined file was quarantined from, the file name of the quarantined file, a timestamp, whether the file was AutoRestored or just Quarantined, the Quarantine folder location and if a file already exists in Quarantine then the file will be renamed using a Timestamp so that it does not overwrite the existing quarantined file. When a file has been quarantined you will see an AutoRestore/Quarantine Alert. To remove that alert from being displayed you will need to click the Reset Last Modified Time in DB button. This synchronizes the last modified time of the actual Quarantine Log file with the timestamp stored in your WordPress database for the last time the Quarantine Log file was modified. Every time a new log entry is made in the Quarantine Log the last modified time of the Quarantine Log file will change.
Example Quarantine Log Entries
A WordPress wp-includes file named atomlib.php was AutoRestored and Quarantined
>>>>>>>>>>> WP-includes File AutoRestore Logged [06/23/2012 7:05 PM] <<<<<<<<<<<
Quarantined File: atomlib.php
Quarantine Folder: /xxxxx/xxxxx/wp-content/bps-backup/quarantine/
AutoRestored File: /xxxxx/xxxxx/wp-includes/atomlib.php
Quarantined From/Restore Path: /xxxxx/xxxxx/wp-includes/atomlib.php
A non-WordPress Added file named testsubfolderfile.txt was AutoRestored and Quarantined
>>>>>>>>>>> non-WordPress Added File AutoRestore Logged [06/24/2012 11:18 PM] <<<<<<<<<<<
Quarantined File: testsubfolderfile.txt
Quarantine Folder: /xxxxx/xxxxx/wp-content/bps-backup/quarantine/
AutoRestored File: /xxxxx/xxxxx/testfolder/testsubfolder/testsubfolderfile.txt
Quarantined From/Restore Path: /xxxxx/xxxxx/testfolder/testsubfolder/testsubfolderfile.txt
A file named hacker-file.txt was Quarantined from the wp-includes folder
>>>>>>>>>>> WP-includes File Quarantine Logged [06/25/2012 7:59 PM] <<<<<<<<<<<
Quarantined File: hacker-file.txt
Quarantine Folder: /xxxxx/xxxxx/wp-content/bps-backup/quarantine/
Quarantined From/Restore Path: /xxxxx/xxxxx/wp-includes/js/hacker-file.txt
A file named hacker-file-test-500.php was Quarantined from a non-WordPress Added folder named orangesub
>>>>>>>>>>> non-WordPress Added File Quarantine Logged [06/26/2012 5:33 PM] <<<<<<<<<<<
Quarantined File: hacker-file-test-500.php
Quarantine Folder: /xxxxx/xxxxx/wp-content/bps-backup/quarantine/
Quarantined From/Restore Path: /xxxxx/xxxxx/orange/orangesub/hacker-file-test-500.php
A file named hacker-file-test-500.php was Quarantined from a non-WordPress Added folder named orangesub and was renamed with a Timestamp because a duplicate file name already exists in Quarantine
>>>>>>>>>>> non-WordPress Added File Quarantine Logged – Duplicate File Renamed [06/26/2012 7:25 PM] <<<<<<<<<<<
Quarantined File: hacker-file-test-500.php
Quarantine Folder: /xxxxx/xxxxx/wp-content/bps-backup/quarantine/
Quarantined From/Restore Path: /xxxxx/xxxxx/orange/orangesub/hacker-file-test-500.php
Renamed To: /xxxxx/xxxxx/wp-content/bps-backup/quarantine/Jun-26-2012–19-25-48–hacker-file-test-500.php


