


BulletProof Security Pro Installation, Setup and Upgrade Video Tutorials
BulletProof Security Pro Direct Upgrade, Zip Installation, Zip Backup & Download
Upgrading from a free version of BulletProof Security to BulletProof Security Pro:
Or
If this is a new installation of BPS Pro and you do not have a previous version of BPS Pro installed:
WordPress Upload Zip installation – Use the WordPress Upload Zip installer to install first time installations of BPS Pro. IMPORTANT!!! Before using the WordPress Upload Zip installer – deactivate and delete the BPS free version (choose “Yes, delete these files”). This does not remove your website security and only removes the BPS free plugin files. Click on Plugins, Click Add New, Click Upload, Click Choose File (or browse), navigate to the folder where the bulletproof-security.zip file is on your computer and click on it, Click Open and Click Install Now.
Manual FTP upload method – FTP to your website an rename the existing /plugins/bulletproof-security folder to something like /old-bulletproof-security. Unzip the bulletproof-security.zip file and upload the entire unzipped bulletproof-security folder to your plugins folder.
WordPress Upload Zip (PCLZIP) Installer Problem – a number is appended to the bulletproof-security folder name
If you use the WordPress Upload Zip installer and do not rename or delete the free BPS plugin version first before installing BPS Pro, a number (2, 3, 4, etc) will be appended to the bulletproof-security folder name during Zip installation. This problem can also occur even if you have already delete the BPS free plugin version from your website. Example Plugin Folder names that you may see: bulletproof-security1, bulletproof-security2 or bulletproof-security3, etc. If this problem does occur then FTP or use your Web Host Control Panel and rename the bulletproof-security1, bulletproof-security2, bulletproof-security3, etc folder name to just bulletproof-security (removing any numbers that have been appended to the bulletproof-security folder name) and then go to the WordPress Plugins page and refresh / reload your browser. This will automatically activate BulletProof Security Pro. Or you may need to click the Activate link under BulletProof Security Pro on your WordPress Plugins page.
*NEW* One Click Direct Upgrade Installation in BPS Pro 5.1.7
One Click Upgrade Installation: Zip download and zip upload installations will no longer be necessary after installing the BPS Pro 5.1.7 upgrade. BPS Pro 5.1.7 contains coding that will allow you to install all future upgrades of BPS Pro in exactly the same way that you install all of your other WordPress plugin upgrades. The upgrade notification is also displayed in exactly the same way as all of your other WordPress plugins. The only difference will be that BPS Pro upgrade will be installed from the AITpro API Server instead of the WordPress Downloads Server.
View additional new Increased Automation features in BPS Pro 5.1.7
Upgrading BPS Pro Using the BPS built-in Zip Upload Installer (no longer necessary as of BPS Pro 5.1.7)
BPS Pro has its own built-in Zip Uploader and Installer. If you are upgrading from a previous version of BulletProof Security Pro to a new version of BulletProof Security Pro then use the BPS Pro Zip Uploader and Zip Installer. Note: The name of the zip file MUST be bulletproof-security.zip. If you have renamed the zip file to something else the zip upgrade will fail. Rename the zip file back to bulletproof-security.zip:
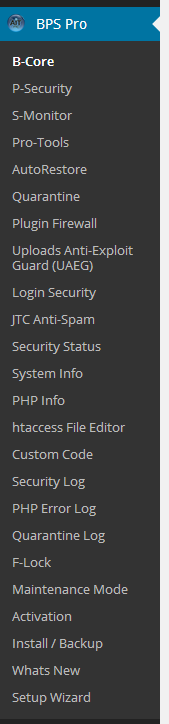
BPS Pro 8.2 Menu for WordPress 3.8+ MP6
Zip Backup, Download and Zip Installation of BPS Pro
A Read Me help hover tooltip with help information has been added to Zip Installation & Backup page. Please read through the Read Me help hover tooltip help information if you would like to know what is affected and what is not affected when performing the upgrades, backups and zip installations.
Zip Backup & Download
Click on the Zip & Backup Files button to back up your current installation of BPS. This is a complete full backup of all your BPS files. All BPS files will be zipped and backed up to /wp-content/bps-backup/bulletproof-security.zip. You should see a message that the Zip Backup was successful.
BPS Pro Zip Backup Successful.
The bulletproof-security.zip file has been saved to: /wp-content/bps-backup/. Click the Download Zip File button to download the bulletproof-security.zip file. Files Zipped: 64 >>> Status Code: 0
(The next time you perform a zip backup you will see an additional message displayed similar to this:
Previous Zip Backup File has been renamed to: August-31-2011–16:55:41–bulletproof-security.zip).
Click on the Download Zip File button to download the backup zip file to your computer. You will see a popup window that displays 2 checks – 1) If the bulletproof-security.php file exists and 2) If the folder permissions are set correctly for the /bps-backup folder. If both checks are good then click OK to download the zip file. If there is a problem here the popup message will tell you exactly what the problem is and what needs to be fixed. Click Cancel and correct the issues first before trying to download the zip backup file again.
Zip Upload & Zip Install
NOTE: if you have renamed the bulletproof-security.zip file to another name the zip upload installation will fail. Rename the zip file back to bulletproof-security.zip.
Click on the Choose File or Browse button (this button name may be different depending on which browser you are using). Navigate / browse / go to the folder where you saved the bulletproof-security.zip file on your computer and click on it to select it and then click the Open button. You should now see the bulletproof-security.zip file name displayed in the File Upload window. Click the Upload Zip File button and you should now see this message “Zip File Upload Successful. Click the Install Now button to install BulletProof Security Pro.” when the Zip file upload is completed. Click the Install Zip Now button. You will see a popup warning about performing a backup first before proceeding with the Zip installation. Click the OK button.
You should now see this message BPS Pro Installation Successful. The uploaded bulletproof-security.zip file has been deleted. If you need to reinstall BPS Pro please upload another bulletproof-security.zip file and click the Install Zip Now button.
Upgrade installation is complete. Activate BPS Pro.
Tags: BPS Pro Direct Upgrade Installation, BPS Pro Zip Backup, BPS Pro Zip Download, BPS Pro Zip Installation, BulletProof Security Direct Upgrade Installation, BulletProof Security Zip Backup, BulletProof Security Zip Installation
Categories: BulletProof Security Pro
I am planning to build a site using the Genesis theme, are they known conflicts with Genesis that I should be aware of? Does it matter if I install BPS PRO first, or Genesis first? thanks.
No, there are no known issues that i am aware of and several people are using the Genesis Framework. Nope does not matter which is installed first, but just remember to turn ARQ off when installing new Themes and them be sure to click the Backup Files buttons before turning ARQ back on.
Looked through posts and didn’t see this problem or answer. Installed BPS PRO on fresh install of WP on hostgator. Install shows as successful, but BPS menu is blank, although yellow highlighted section at top is there. Click any of the links and it still shows blank. Read that some plugins causie menu display issues but I had deleted the two default plugins and had no others installed. I’m stuck.
Fixed. looks like I mistakenly entered the activation code for a different domain.
Yep i was just about to respond to your first question and ask if you had entered a valid Activation Key. 😉 Activation Keys are unique for each website. Thanks for confirming that all is well.
Complete Newbie to wordpress and BPS. Should I NOT use XAMPP as my local dev environment if I plan on transferring WP, with BPS already installed, to a non-xampp production environment (hostgator) later? Your 5-minute install video shows that XAMPP requires that you escape characters in the http_error_log.txt path, and turn off alerts in the file lock area, which would not be the case for hostgator.
My hope was to develop the site locally (on XAMPP that I’ve setup), have plugins already installed and configured, and then copy the site to hostgator. Of course, I know so little at this point, I don’t even know if I can do it that way, but assuming that I can – should I move to WAMP over XAMPP so that BPS will be set up better for hostgator on the eventual upload? Do you suggest that we not load BPS PRO on the development environment at all? Do you suggest we install BPS fresh on the production server?
It is fine to develop in a XAMPP or MAMPP environment with BPS Pro to ensure that there are not any conflicts with Themes, Plugins or custom coding. And yes what i then recommend is that after Development testing is completed you install BPS Pro clean on the Production site. BPS Pro only takes 5 minutes to setup these days and you would not want to migrate/copy up things like ARQ Backup Files and Activation Keys are website specific/unique (you would need to request a new Activation Key using the Activation Get Key button for the Production site) so it is best just to do a clean install on the Production site and then go through the 5 minute setup steps. BPS Pro 5 Minute Setup Video Tutorial >>> http://www.ait-pro.com/aitpro-blog/videos/quick-install/bps-pro-quick-setup.html
I know BPS PRO only takes 5 minutes, but still I was hoping to load all of the 7 or 8 typical plugins I would use and have a “base site” that that I start with for each new project. Does BPS introduce anything to consider beyond the normal steps when cloning/converting an existing site to a new domain?
These are the procedural steps that i recommend for Migrating, Moving or Cloning websites.
1. Turn off ARQ
2. Click all 4 Delete Files buttons in AutoRestore.
3. Use the BPS Backup feature in B-Core and backup your .htaccess files.
4. Put your website in Default Mode.
5. Unlock all your files in F-Lock.
6. Perform your Clone, Website Backup or Migration.
7. On the new site.
8. Go to AutoRestore and click the 4 Backup Files buttons and turn ARQ back on.
9. Go to B-Core and either use the Restore feature or create new htaccess files with AutoMagic and activate BulletProof Modes.
10. Go to F-Lock and lock all your files.
And if you are moving from Shared Hosting to VPS or Dedicated you would also want to do this step.
Delete your existing custom php.ini file and then you will need to create a new custom php.ini file following the instructions in the link below for VPS or Dedicated Hosting or you can just use the ini_set Options and not create a new custom php.ini file for this new VPS or Dedicated Server.
http://www.ait-pro.com/aitpro-blog/2853/bulletproof-security-pro/php-ini-general-and-host-specific-php-ini-information-for-bps-pro/#vps-dedicated-hosting-phpini-help
Thanks. answers to few more questions would help me understand how it all works:
1. why do htaccess files need to be backed up and restored separately from the whole website backup and restore? seems redundant.
2. why does the website need to be put into default mode prior to backup? what would the problem be if it was not?
3. Can any of these steps be omitted if I am taking a normal/routine backup (database and WP folders) of the production website, rather than a backup for later cloning?
1. Well actually the .htaccess files do not need to be backed up in the typical sense/use of backing up files to save copies. Let me give you a quick example of how this would be used. Let’s say you install a new plugin and something does not appear to be working correctly and you want to eliminate that BPS Pro is causing the issue/problem. This method below gives you a quick way to troubleshoot and eliminate BPS Pro as causing the issue/problem and then switch back into BulletProof Mode without having to do the typical plugin deactivate and reactivate that you would have to do with other plugins.
Source: http://www.ait-pro.com/aitpro-blog/
1. Make a backup of your .htaccess files using BulletProof Security built-in Backup.
2. Activate Default Mode on the Security Modes page.
3. Use the Delete wp-admin .htaccess feature on the Security Modes page.
4. Test your plugin or theme.
5. Restore your .htaccess files using BulletProof Security built-in Restore.
2. You do not need to put BPS Pro in Default Mode while doing a backup. You would want to put BPS Pro in Default Mode if you were Cloning, Moving or Migrating your website.
3. Answered above.
Hi,
i just bought the bulletproof pro version. I deactivated the free version and deletet it after that. I checked via ftp and there were no more bulletproof folders.
Then i uploaded the new bulletproof pro zip folder and all went ok. “Plugin was installes” But when i want to activate it there comes an error message: Plugin can’t be activatet because it produces fatal error!.
I checked everything twice but could’nd find a solution. i use wp version 3.4.2
Please help…
Hi,
I am sending you a private email to get more details that should not be displayed publicly. Thanks.
Hi there,
I just purchased the plugin but I have not yet received the activation code (more than 15 mins since i pressed the button. Appreciate your help please.
Hello,
I see that Activation Keys are being automatically generated and emailed to you so I am looking into this further right now and will contact you directly via email since this information needs to be private and not publicly displayed. Thank you.
[…] Built-in Zip Install, Zip Backup & Zip Upgrade […]
[…] BulletProof Security Pro – Zip Installation, Zip Backup and Download […]
[…] BulletProof Security Pro – Zip Installation, Zip Backup and Download […]
[…] BulletProof Security Pro – Zip Installation, Zip Backup and Download […]
[…] BulletProof Security Pro – Zip Installation, Zip Backup and Download […]
[…] BulletProof Security Pro – Zip Installation, Zip Backup and Download […]
[…] BulletProof Security Pro – Zip Installation, Zip Backup and Download […]